How Recovery Works: The Basic Sequence
Understanding recovery requires understanding the motor's role in the deployment sequence. A standard model rocket motor has three phases: the thrust phase (propellant burns, rocket accelerates), the coast phase (motor burned out, rocket coasts upward on momentum), and the ejection phase (motor fires a small black powder ejection charge that pressurizes the body tube, pops off the nose cone, and deploys the recovery device).
The delay element in the motor — the number after the dash in motor codes like C6-5 — is the time in seconds between motor burnout and ejection charge firing. A 5-second delay means the rocket coasts for 5 seconds after motor burnout before the ejection charge fires. The correct delay gets the ejection as close to apogee (peak altitude) as possible, when the rocket's vertical velocity is near zero and conditions are safest for recovery deployment.
Choosing the wrong delay is the most common beginner mistake. Too short a delay fires the ejection while the rocket is still going up fast — the sudden drag from a deploying parachute can damage or destroy the rocket. Too long a delay and the rocket is already falling fast when the chute deploys, potentially causing a zipper (recovery harness ripping through the airframe) or insufficient altitude for full deployment.
Streamers: The Underappreciated Option
Streamers are long, narrow strips of mylar, plastic, or cloth that deploy from the rocket and create drag through their fluttering motion rather than a large surface area. They slow the rocket's descent more than free-fall but significantly less than a parachute, resulting in a faster descent and much less horizontal drift.
Streamers are ideal for:
- Small launch areas: A rocket on a streamer drifts 50–150 feet downwind in moderate conditions. The same rocket on a parachute might drift 500–1,000 feet. On a park field or suburban backyard, this difference is the difference between a recoverable rocket and a lost one.
- Lighter rockets: Streamers work best on rockets under about 3 oz. Heavier rockets need the greater drag of a parachute to land without damage.
- Windy conditions: When wind is higher than comfortable for parachute recovery, a streamer keeps the rocket close.
- Demonstration flights: Club launches and demonstrations benefit from streamers because spectators can watch the whole flight without the rocket disappearing over the horizon.
Sizing a streamer: a rule of thumb is that the streamer length should be 10–15x the rocket's body diameter, and width should be about 1x the body diameter. A 1.6-inch diameter rocket works well with a streamer that's 1.5 inches wide and 18–24 inches long. Experiment — streamer performance varies with material weight and surface texture.
Parachutes: Sizing, Packing, and Common Failures
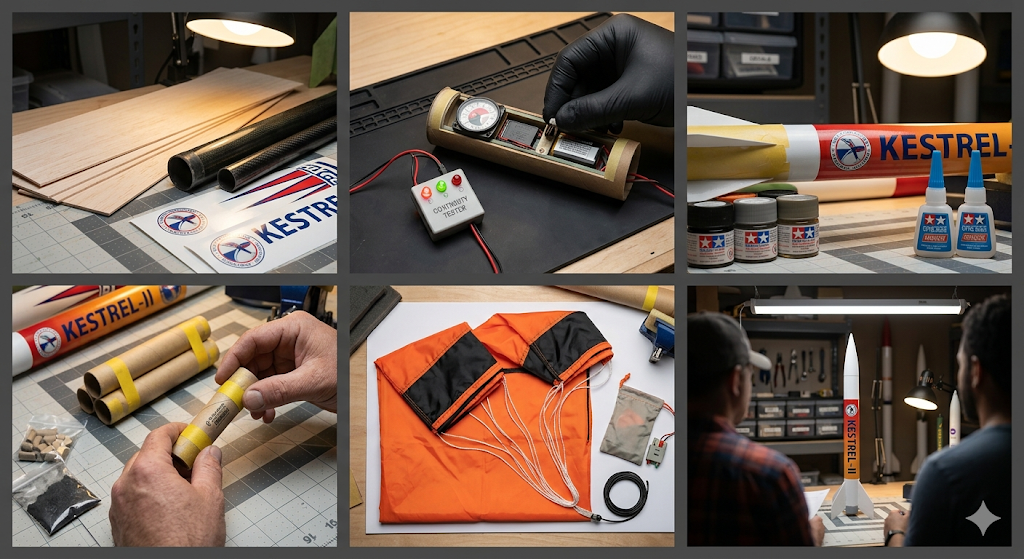
Parachutes are the standard recovery method for most model rockets, providing a slow, controlled descent that prevents damage on landing. The key variables are parachute diameter, descent rate, and packing method.
Sizing Your Parachute
Parachute diameter is determined by the rocket's weight and your target descent rate. The standard target descent rate for model rockets is 15–20 feet per second — fast enough to keep the rocket from drifting excessively but slow enough to prevent damage on landing. The formula for parachute diameter (in inches) is:
Chute Diameter (inches) = √( (W × 2,000) / (0.44 × π) )
Where W = rocket weight in pounds at landing (approximately launch weight minus motor propellant burned).
A simpler rule of thumb: rocket weight in ounces × 3 = minimum chute diameter in inches for a 20 fps descent. A 4-oz rocket needs at minimum a 12-inch parachute. A 12-oz rocket needs at minimum an 18-inch parachute.
Using our Motor Selector Tool will give you a parachute size recommendation alongside motor class guidance for your specific rocket configuration.
Packing Your Parachute
A poorly packed parachute is the most common cause of recovery failures in low-power rocketry. Here is the correct packing sequence for a standard plastic or mylar parachute:
- Spread the chute flat.
Lay it on a clean surface and identify all shroud lines. Make sure no lines are twisted around each other or around the canopy body.
- Fold the chute accordion-style.
Fold it in thirds lengthwise, then fold those sections in half. The goal is a package that slides easily into the body tube without catching on the walls.
- Coil the shroud lines loosely.
Wrap the shroud lines around the folded canopy in a loose coil. Do not wrap tightly — lines that are over-wound will tangle when deployed.
- Install recovery wadding first.
Place 3–6 squares of recovery wadding into the body tube below the parachute bay before inserting the chute. The wadding protects the parachute from ejection charge gases and small sparks.
- Insert the folded chute.
Slide the chute into the tube with the shroud line attachment point (where lines connect to the rocket) going in last so it's nearest the nose cone end of the bay.
Common Parachute Failure Modes
Understanding failure modes helps you prevent them:
- Tangle (most common): Lines wrap around each other or the canopy before deployment. Prevent by ensuring lines are carefully un-twisted during packing. A swivel between the shock cord and chute shroud lines significantly reduces tangle.
- Burn damage: Ejection gases or a burning ember from the motor contacts the chute before it deploys. Prevent with adequate recovery wadding — use 4–6 squares for D motors and above.
- Chute too tight: Over-packed chute doesn't have enough free space in the tube to fully unfold. The nose cone pops but the chute doesn't emerge fully. Prevent by packing looser and ensuring the body tube's recovery section is clear of debris.
- Shock cord failure: The elastic shock cord connecting nose cone to body tube breaks under deployment stress. Replace shock cord if it shows any signs of fraying, burning, or dry-rot stiffness. Replace after every 10–15 flights as preventive maintenance.
Dual-Deployment Recovery: The HPR Standard
For high-power rocketry on H motors and above, simple ejection-charge recovery becomes impractical. Rockets reaching 3,000–15,000 feet need a system that deploys a small drogue parachute at apogee (preventing excessive drift at altitude) and a larger main parachute at a lower altitude (ensuring a safe, slow landing). This is dual deployment.
How Dual Deployment Works
A dual-deployment system uses an electronic altimeter (or two, for redundancy) to detect flight events and fire black powder ejection charges at precise moments. The sequence:
- Rocket launches and boosts on motor power
- Motor burnout; rocket coasts upward
- Altimeter detects apogee (zero vertical velocity or barometric pressure plateau)
- Altimeter fires drogue deployment charge → small drogue chute (12–18 inches) deploys from the aft end of the rocket
- Rocket descends under drogue at 50–80 feet per second — fast enough to minimize horizontal drift, slow enough to be safe
- Altimeter detects preset main deployment altitude (typically 500–800 feet AGL)
- Altimeter fires main deployment charge → large main parachute deploys from forward section
- Rocket descends at 15–20 feet per second to safe landing
Altimeter Selection and Programming
Popular altimeters for beginner HPR dual-deployment setups include the Perfectflite SLCF, the Missile Works RRC3, and the Eggtimer Quantum. All measure barometric pressure to determine altitude and velocity. Key considerations when selecting an altimeter:
- Redundancy: Most experienced HPR flyers use two altimeters on two separate battery circuits, wired to independent pyrotechnic charges. If one altimeter fails, the other fires the deployment. Single-altimeter setups are common at Level 1 but becoming less standard at Level 2 and above.
- Programming interface: Some altimeters program via physical switches on the board; others use a Bluetooth app or USB connection. The app-based systems are faster and less error-prone than manual switch sequences.
- Data logging: Most modern altimeters log flight data (altitude trace, apogee, max velocity, deployment events) to internal memory. This data is invaluable for troubleshooting and for showing certifiers that your system performed as expected.
- Battery type: 9V batteries are standard for most altimeters. Fresh batteries before every flight — altimeter battery failure on the pad is a preventable failure mode. Test the arming sequence on the ground before going to the launch rod.
Black Powder Charge Sizing
Dual-deployment altimeters fire small black powder (BP) charges to pressurize the airframe sections and separate the rocket at apogee and at main deployment. Charge sizing is one of the skills that separates experienced HPR flyers from beginners. Too little BP and the separation doesn't happen; too much and you blow out the electronics bay or damage internal components.
The standard starting formula for BP charge sizing is 1 gram of FFFF-grade black powder per 100 cubic inches of internal volume for a shear-pin separated airframe section. This is a starting point — charge size must be empirically verified with ground ejection tests before flying. A ground test: assemble the rocket as for flight, lay it horizontally on a flat surface, connect the altimeter to a launch controller, and fire the charge. The sections should separate cleanly and the recovery device should eject fully.
GPS Tracking for High-Altitude Flights
For flights expected to reach above 3,000–4,000 feet, GPS trackers are increasingly standard equipment. A GPS unit installed in the rocket transmits its position to a ground receiver, allowing you to locate the rocket after landing even if visual tracking was lost at altitude. Popular systems include the Featherweight GPS, the BigRedBee BeeLine GPS, and the Eggtimer Proton.
At most HPR club fields, GPS is required on any rocket expected to reach more than 50% of the field's waiver altitude. Check your club's range safety rules before flying without one on high-altitude configurations.
The recovery system mindset: Every experienced rocketeer has a story about a beautiful boost followed by a ballistic recovery because the chute didn't deploy. That story is almost always a preparation error — wrong packing, bad shock cord, insufficient wadding, or a misfire of the ejection charge due to an igniter seating issue. Build your recovery system last and inspect it most carefully. The motor will almost certainly do its job. The recovery system is where careful attention pays off.